
Browse all docs
Setup and admin
The Team Tab
The Team tab is where you invite teammates, set what each person can do, assign the sites they work on, and manage or remove accounts in this workspace.
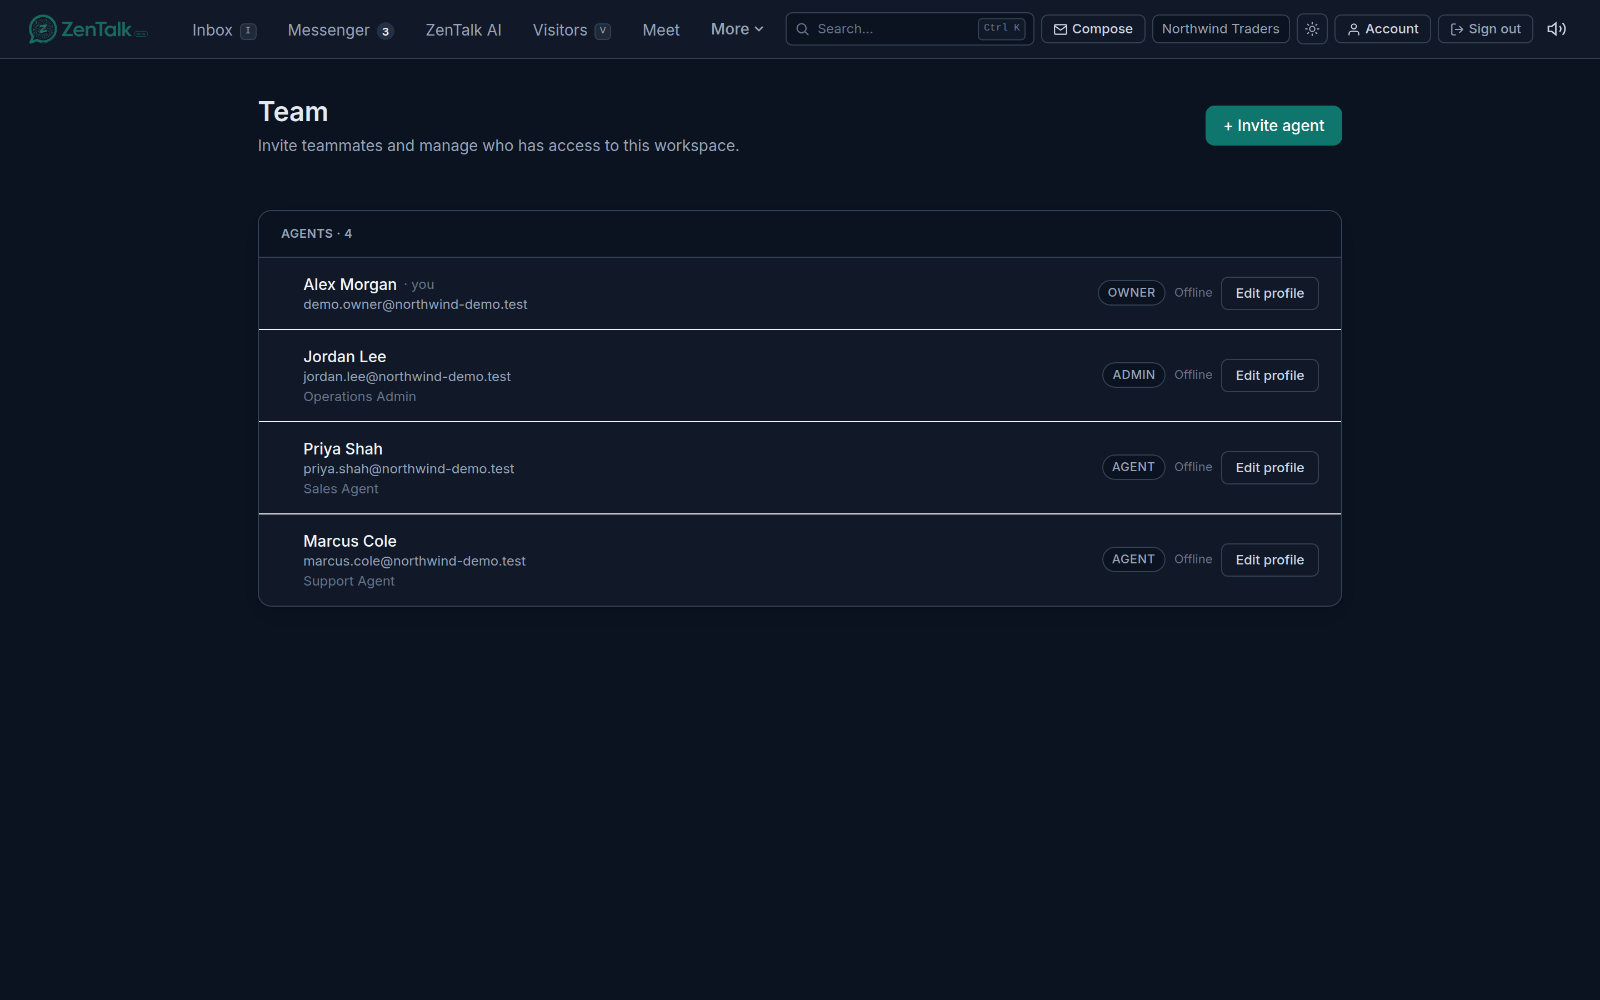
What the Team tab is for
Open the dashboard and go to Team. The page lists everyone in the workspace with a green or gray dot for online or offline, their name, email, job title, and role. If your workspace belongs to a larger organization, a "Part of <Org>" banner sits at the top with a link to the organization view, where you can see people across every workspace.
Anyone can open the Team tab, but only owners and admin-tier roles see the management controls. Regular agents see the list without the invite button or the Edit profile controls.
Inviting a teammate
Click + Add a teammate in the top right to open the invite form, then:
- Enter the teammate's Email and Name.
- Pick a Role. A short description under the dropdown explains what the selected role can do.
- Click Send invitation. The person gets an email with a link to set their password and join.
If you already created someone as an HR-only employee stub on the Employees page, the form shows a "Pick from existing employees" dropdown. Choosing one auto-fills and locks the email and name, and the button changes to Send promotion invite. Promoting an existing employee preserves their HR record (salary, shift, slips) instead of creating a duplicate. Clear the picker to invite a brand-new email instead.
Seats
Each teammate with a login uses one licensed seat. Owners and admins see a seats panel at the top of the page showing how many seats are in use, the monthly cost, and how many open seats you have left. When every seat is taken, the panel is marked Full and the invite button asks you to add a seat first. Click Buy or manage seats to change your seat count on the Billing page. See Billing.
Pending and past invitations
Below the agent list, admins see two sections. Pending invitations lists invites that have not been accepted yet, each with the role, an expiry date, and a preview link. For each pending invite you can:
- Resend the invitation email.
- Revoke it, which stops the link from working.
A Recent invitations section shows the last few invites with a status pill: Pending, Accepted, Revoked, or Expired.
Roles and what each can do
Every teammate has one role that sets their permissions:
- Owner: total control. Can manage everyone, promote and demote any role, hand out Compliance authority, and change every setting. Owners always see visitor contact info and have every module.
- Admin: full management. Can invite teammates, configure the workspace, and access all modules. Admins can manage agent-role accounts but cannot promote anyone to Owner or edit other admin-tier teammates.
- Agent: handles chats and the modules assigned to them. No management access.
- Viewer: read-only. See the Viewer section below.
The invite form also offers a few admin-tier variants: Marketeer(admin-level monitoring access, with Chat, Tickets, and Insights by default), Networking (admin-level access for mail, sender domains, and site domains, for the person who handles email infra and DNS), and Compliance (a workspace-scoped officer who can delete chat and Messenger messages in this workspace and view the moderation audit log, but cannot manage sites, agents, billing, or integrations). Compliance and Owner can only be granted by an owner.
The read-only Viewer role
Viewer is a read-only observer. A Viewer can view site details, visitor history, and inbox conversations for the sites they are assigned, but cannot reply, join chats, change settings, or delete anything. Because the role grants no write access, admins as well as owners can assign it. Use it for stakeholders who need to watch conversations without acting on them.
Editing a teammate: the Edit profile modal
Each row has an Edit profile button that opens one modal holding all the controls for that person. Which sections appear depends on your role and theirs. Inside the modal you can:
- Role: change the person's role from the dropdown. You cannot change your own role, and the list only offers roles you are allowed to grant.
- Reports to: pick this person's reporting lead, or choose "No lead". See Reporting structure.
- Visitor contact info: for agent-role accounts, toggle whether they see visitor email and phone or a masked version. The button reads Visible or Hidden.
- Access: set the person's job title and check the modules they can use, then click Save title or Save modules. Owner targets have every module implicitly, and you cannot edit your own modules.
- Call recordings: for agent-role accounts, choose Allowed or No access to control whether they can open the Call Recordings page to listen to and download recordings. Owners and admins always have access.
- Monthly sales target: click Open target to set or review this agent's target.
The modal also points you to Add-ons. Recording and Live Monitoring are workspace add-ons that cover your whole team and every site, so they are managed in Settings, Billing rather than per person.
Click Done or the close control to leave the modal.
Reporting structure and leads
The "Reports to" field builds a simple reporting line. When you set a lead for someone, that person's row shows "Reports to <name>", and anyone with at least one direct report gets a Lead badge. The system keeps people in the same workspace, blocks assigning someone to themselves, and prevents reporting cycles.
Login email, passwords, and 2FA
- Revoke 2FA (owner): in the Edit profile modal, wipes a teammate's two-factor secret so they can re-enroll on their next login. Use this when someone loses their authenticator.
- Forgotten passwords: a teammate who forgets their password can reset it themselves with the Forgot password? link on the sign-in screen.
- Login email: a teammate's login email is not self-editable. To change one, contact ZenTalk support.
Deactivating and removing a teammate
In the Edit profile modal, the Remove from workspacesection removes the account. Click Remove and confirm. Access is revoked immediately, but their conversations and tickets stay in place; only the account is removed. Owners can remove anyone except themselves, and admins can remove agent-role teammates.
Related
For managing people across every workspace under one company, see the organization view. To create HR records, shifts, and stubs you can later promote to logins, see Employees. New here? Start with getting started.