
Browse all docs
Getting started
Getting started
Welcome to ZenTalk. This page gets you oriented: how to log in, how the dashboard is laid out, how the top navigation works, and where to find the tab you need for the job in front of you.
Creating your account
New to ZenTalk? Click Start free trial on usezentalk.com to reach the Create your ZenTalk account page. Enter your details and ZenTalk sets up your workspace and a first site for you, then takes you to a short welcome checklist:
- Confirm your email: click the link in the email we send you. Some steps, such as inviting teammates and billing, wait until your email is confirmed.
- Start your 7-day free trial: click Add card & start trial. A card is needed to start the trial, and there is no charge today.
- Add the widget to your website: copy the install snippet onto your site. See Sites.
- Publish and start chatting: once the widget is live, visitors can reach you and conversations arrive in your Inbox.
Logging in
Open your ZenTalk dashboard and sign in on the "Welcome back" screen. Enter your work email and password, then click Sign in.
- Enter your email (for example you@company.com) and your password.
- If two-factor authentication is turned on for your account, you will be asked for your auth code next. Enter the 6-digit code from your authenticator app, or a recovery code if you have lost your device.
- If you belong to more than one workspace, you will land on a "Choose a workspace" step. Pick the workspace you want to work in.
Forgot your password? Use the Forgot password? link on the sign-in screen to reset it. Once you are in, ZenTalk keeps your session alive in the background so you are not bounced to the login screen while you are reading or drafting a reply.
The dashboard layout
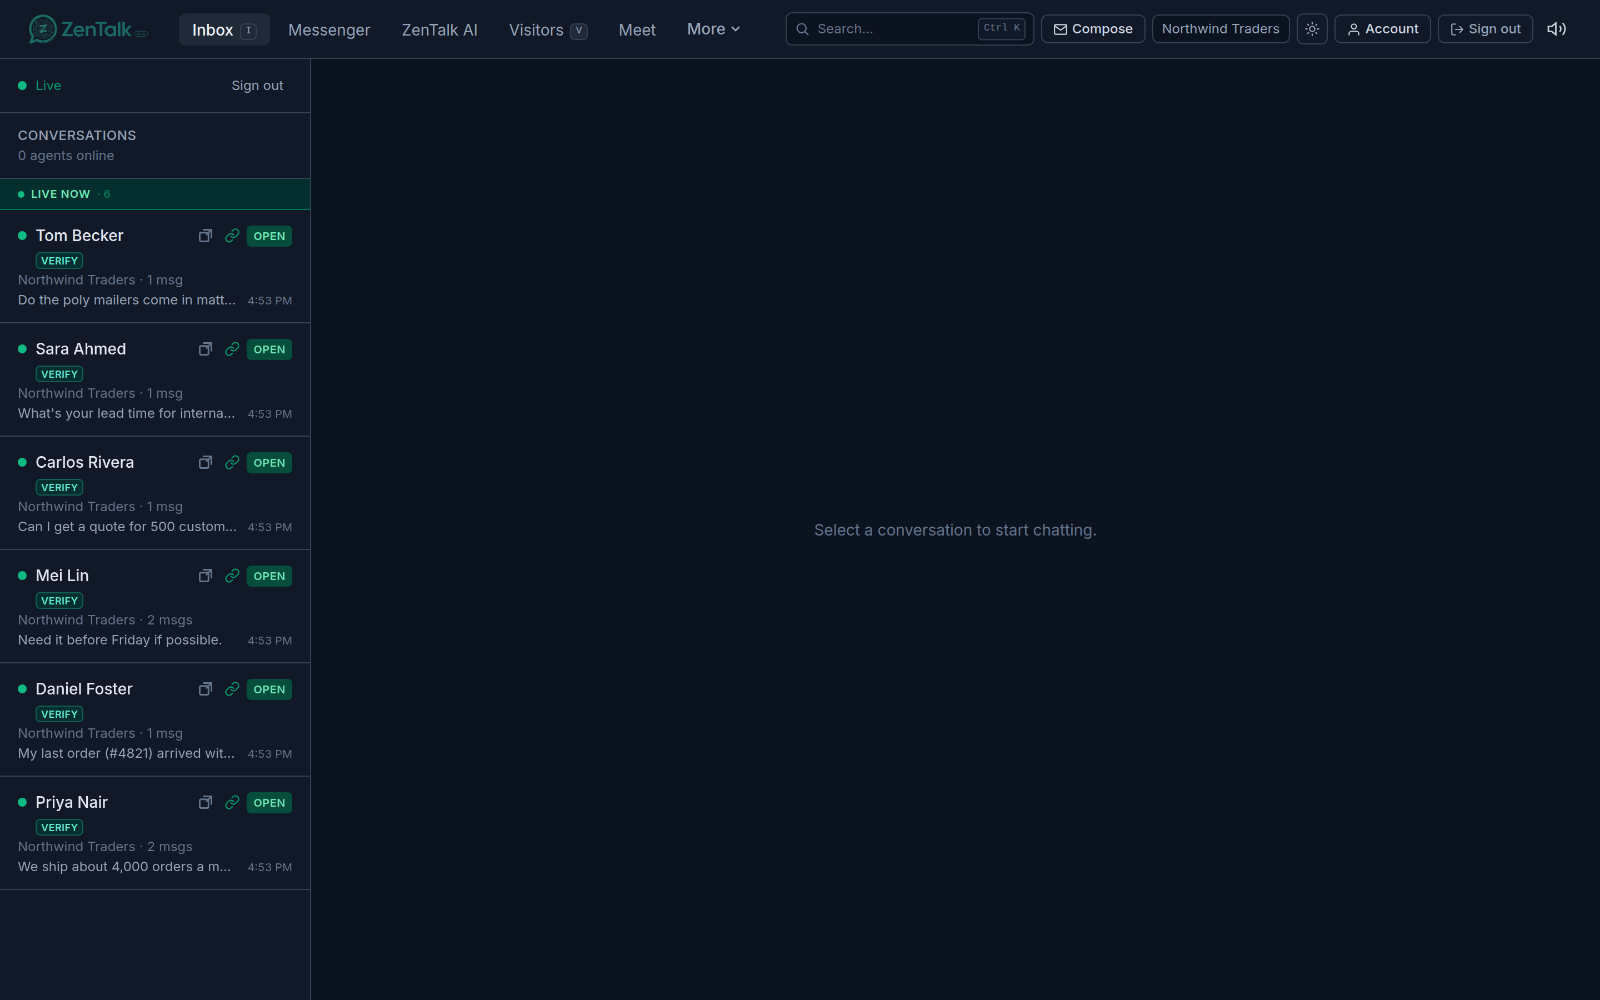
Every page in ZenTalk shares the same frame. Across the top is the navigation bar with the ZenTalk logo on the left, your tabs in the middle, and a cluster of tools and account controls on the right. The main area below the bar changes depending on which tab you are on. The Inbox, for example, shows your conversation list beside the open conversation, while a page like Sites shows a list you manage.
The right-side cluster in the top bar stays with you on every page. It holds search, a compose-email button, a payment-link button, a workspace switcher when you have more than one workspace, a light or dark theme toggle, a sound-effects menu, a link to your Account, and a Sign out button.
The top navigation bar and the More menu
Your tabs live in the middle of the top bar. ZenTalk shows as many of them inline as your screen is wide enough to fit. When there is not enough room for all of them, the ones that do not fit flow into aMore dropdown at the end of the row. Click More to see the rest and jump to any of them. On a wide monitor most or all of your tabs sit inline; on a laptop or narrow window more of them move into More.
Some tabs are marked as secondary, which means they are the first to move into the More menu when space is tight. Everyday tabs like Inbox and Visitors stay inline as long as possible; setup and admin tabs are the ones that spill first.
A few tabs show a small red dot when something has happened since you last looked, for example a new visitor message on the Inbox tab or new activity on Visitors. Messenger shows a count of unread team messages. Opening the tab clears its indicator.
Modules: why some tabs appear and others do not
ZenTalk is organized into modules, and your workspace only turns on the ones it uses. A tab only appears if its module is enabled for you. The main modules are:
- CHAT covers the live-chat product: Inbox, Visitors, Customers, Sites, Appointments, Replies, Ratings, Analytics, and more.
- TICKETS adds the Tickets queue for support requests.
- HR adds Employees and the attendance Reasons review queue.
- PROJECTS adds the Projects tab (kanban boards and deliveries).
- SHEETS adds collaborative spreadsheets.
- DOCS adds collaborative rich-text documents.
- INSIGHTS adds the Insights conversion-intelligence tab.
This is why two teammates can see different tabs in the same workspace. A developer who only has the PROJECTS module will see Projects but not the Inbox, while a support agent with CHAT will see the Inbox but not Projects. A handful of tabs (Messenger, Meet, ZenTalk AI, Team) are available to everyone in the workspace and are not gated by a module.
Some tabs depend on what your workspace has set up rather than on a module. Channels appears for owners, admins, and marketeers. Numbers & Wallet sits in the More menu for owners and admins, and Billing for owners and admins. Call Recordings appears in the More menu for owners, admins, and agents who have been given access. Session Recordings appears when the workspace has the Recording add-on.
Roles and how they gate tabs
Your role decides what you are allowed to do and, along with modules, which tabs you see. The common roles are:
- Agent: handles conversations and their own work. Agents do not see admin-only tabs such as Employees, Domains, Channels, Leads, Workspace settings, and Payments.
- Admin: everything an agent has, plus the admin-only tabs for running the workspace (Sites, Channels, Domains, Employees, Leads, Workspace, Payments, Numbers & Wallet, Get Report, and similar).
- Owner: full access to the workspace, including owner-only surfaces like the AI Brain and Billing. Owners implicitly have every module.
- Viewer: a read-only role. Viewers can see assigned work but cannot make changes.
There are also a few specialist roles, such as Marketeer, Networking, and Compliance. See Team for what each one can do.
If you open a tab you are not allowed to use, for example by following an old bookmark, ZenTalk sends you back to a page you can use rather than showing an error. If a tab you expect is missing, it is almost always because your role or your enabled modules do not include it. Ask your workspace owner or admin to grant the module or change your role.
Keyboard shortcuts
ZenTalk has a few single-key shortcuts to move around fast. They work only when you are not typing in a field:
- Press I to jump to the Inbox.
- Press V to jump to Visitors.
These fire only when no modifier key is held and your cursor is not in a message composer, search box, or notes field, so typing "i" or "v" in a reply never navigates you away.
Your account and profile
Click Account in the top-right of the bar (or the Account link in the mobile drawer) to manage your own settings. The Account page is always reachable, whatever your role or modules. From there you can:
- Update your Profile, including your display name.
- Set a reading language so incoming messages are translated for you, or turn translation off to read originals.
- Change your password.
- Turn on two-factor authentication for an extra login step.
- Sign out, and review or revoke sessions on your other devices.
You can also sign out directly from the top bar at any time using the Sign out button next to the Account link.
Where to go next
Now that you know your way around, start with the pages you will use most: the Inbox for handling conversations, the Customers page for the people you have engaged, and Sites for connecting your website and configuring the chat widget.